HOMEMADE VEGAN YOGURT
We may earn a commission if you decide to make a purchase through our links, at no cost to you. As an Amazon Associate I earn from qualifying purchases. Please read our privacy policy for details.
Vegan Yogurt doesn’t have to be expensive, complicated, or out of reach. It can be made at home with 4 ingredients and very little hands-on time.

WANT TO SAVE THIS RECIPE?
Vegan yogurt is finally available at most grocery stores. More and more veg-friendly brands are popping up with dairy-free cheeses, yogurts, ice creams, and really anything you could ever want.
Hell, I can even get a vegan form of Cheese-its if I really want.
But of course these products come at a price.
For one, there’s the physical dollar amount cost – and mama, those little yogurts are not cheap! 2-3 bucks a pop, and if you want one every day for your snack or breakfast, hell that’s $14-21 a week! Just on yogurt. So not necessary when you can just make your own.
And then there’s the fact that homemade is just better. You can control the amount of sugar. You know exactly what’s going into it. And you can customize each cup of yogurt to your liking.
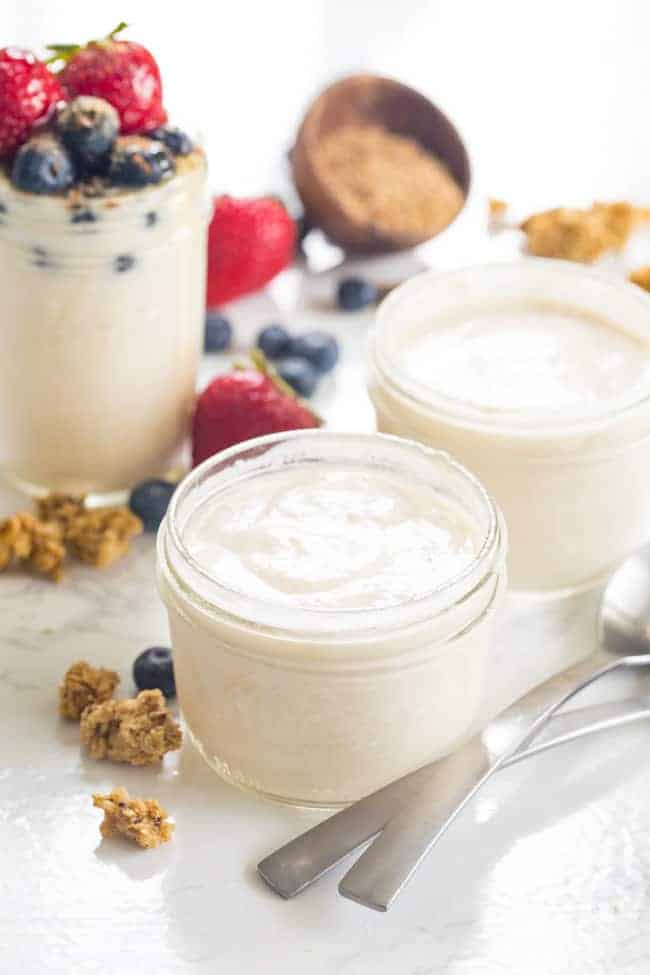
But the thought of making homemade yogurt is a little daunting. At least it was for me.
Fermentation. Probiotic pills. Sterilization. All the things were totally overwhelming that I just wanted to say screw it. But I also really wanted to try it out.
And then a fellow Salt Lake vegan posted in the local Facebook group all her trials and wins in her yogurt making journey. And oh.my.god, I was blown away with how easy it could be. So easy that I made it within just a couple days.
The funny thing is that that was over 3 months ago when I did the initial testing and experimenting with the yogurt. Why the wait? I was nervous. Nervous that it wouldn’t be perfect. Nervous that it wouldn’t work for you. And this being such a staple recipe, I knew it had to work out.
So let’s get down to it and I’ll show you how it’s done.
First off though, let me answer the question I know you’re asking yourself.
Is it really cheaper to make homemade yogurt?
I know what you’re you’re thinking. You see the ingredients. Raw cashews aren’t cheap. The carton of store bought yogurt isn’t cheap. But let’s break it down.
- Approximately 4 cups cashews = approx $9. Divided by the 4 (since you only need 1 cup per recipe) = $2.25
- 4 cups almond milk = approx $2.50
- 16 oz tapioca starch/flour = 13.26. Divide by 32 (number of tablespoons in 16 oz) = $0.41 per tablespoon. Time 2 for 2 tablespoons in the recipe = $0.82
- 1 cup plain almond milk yogurt = approx $2.50
Ok woah – there’s the nerd in me coming out, but just stick with me here.
Add that all up and you have $8.07 and that’s for the entire batch of yogurt that makes about 8 cups of yogurt!
So that makes a grand total of $1.01 for one serving of vegan dairy-free yogurt!!
If you’re used to buying store-bought yogurt, you know how much of a savings that is. The awesome thing is that you’re just gonna keep on saving as you make it over and over again because you won’t have to buy the almond milk yogurt starter each time. You’ll just save one cup of the yogurt you made and use that as your starter.
That knocks $2.50 out of the total price knocking it down to $0.70 per serving!!
I’m sorry – there are a couple things I really geek out about, and one of them is math/budgeting/saving money. But you can see that it’s totally worth geeking out about right.
So TL:DR – yes you’re saving money. Proceed.
Does vegan yogurt have probiotics?
This is a question I wondered right off the bat. If I’m making my own yogurt am I still going to get all the benefits from yogurt I buy in the store?
The gut health they talk about. The healthy bacteria. The good stuff.
So I had to do a little research, cause woah guys – you know I’m not a professional right? I mean, I know some things, but google’s my best friend when it comes down to it.
So according to GoDairyFree.org, “The benefits of probiotics are created in the process of fermentation, so the medium is not necessarily what is important.”
Just be sure to keep your yogurt chilled in the fridge so those gut-healers don’t get killed off and can reach your gut properly.
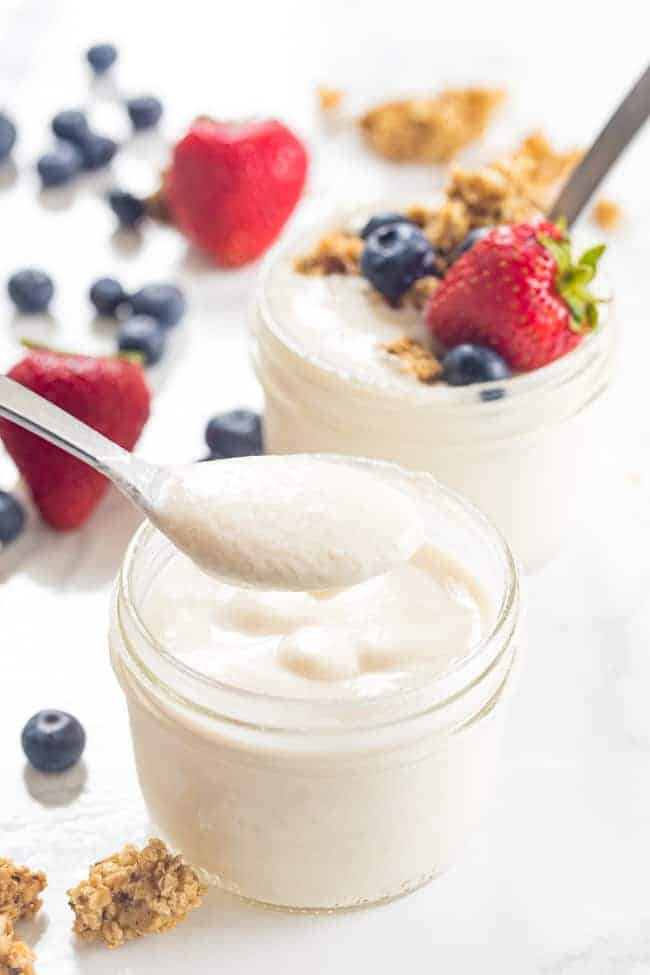
How do you make vegan yogurt?
You’re going to be so shocked at how easy it is to make a dairy-free vegan yogurt from scratch right in your own kitchen. There’s really not much to it at all
First thing’s first.
- If you have a high speed blender like a Vitamix or a Blendtec, you can skip this part. Otherwise, make sure to soak your cashews overnight (or even an hour in boiling water will do).
- Once your cashews are soft (of once you’ve bought your Vitamix) it’s time to blend the cashews, almond milk, and tapioca starch.
- Once smooth, transfer to a small pot or large saucepan and stir constantly at medium heat, allowing it to thicken and come to 180 degrees F. This took about 30 minutes or so. Yes, that’s constant stirring for 30 minutes. Put on a podcast or show on Hulu and get your stir on.
- Once it’s come to temperature, let the mixture cool to 110 degrees F. This took about another 30 minutes.
- Transfer 2 cups of mixture to glass bowl or measuring cup. Add your store-bought almond milk yogurt and stir to combine. Then just pour is back into the remaining mixture on the stove and stir it up.
- Now you can transfer entire mixture to sterilized jars (3 16-ounce jars or 6 8-oz jars would work). And if you have no idea how to sterilize the jars (neither did I), I’m gonna tell you how in the next section. It’s SO easy and way less scary than I thought it would be.
- At this point, you can put the jars in an electric pressure cooker or the oven.
- PRESSURE COOKER INSTRUCTIONS: Add 2 cups of water to the pressure cooker. Add the rack that came with the pressure cooker. Place jars on top (you can layer a rack on top of the jars if you’re using short jars.) Add the lid and use the yogurt cycle.
- STOVE INSTRUCTIONS: Preheat oven to 200 degrees F with a baking stone in the bottom. Heat for 30 minutes (you can sterilize your jars now!), and turn oven off. Wrap jars with thick towels on a baking sheet. Place in oven (turned off) for 6-8 hours to culture. Cap the jars and refrigerate for at least 8 hours.
- Sweeten as desired with fruit, maple syrup, or sweetener of choice.
- Save one cup of your yogurt batch to make the next one without having to buy a whole new container of yogurt. This is where the true savings come in to play!
See?! SO freakin easy, right?
How to sterilize your jars for yogurt.
Yup. As soon as I heard I’d have to pour yogurt into sterilized jars, I decided I wasn’t gonna do it. I’m not into canning. My house is a wreck all the time. The last thing I have is a sterile area to produce anything.
But again, a quick little google search told me I just had to put the glass jars into a hot oven for 30 minutes and I’d be good.
Really that’s it.
So you’re going to put a baking stone in the oven as a hot source to contain the heat and keep your oven relatively warm without having to keep the oven turned on for the whole 8 hours the yogurt is fermenting. Here’s the baking stone I use. Preheat oven to 200 degrees F.
Gather your clean jars and place them on a baking sheet in the oven. After 30 minutes, remove the jars to fill with yogurt. Turn off the oven and place filled jars back into the oven to ferment for 8 hours.
Really that’s it! So simple. So not intimidating!
You got this!
So that’s it!
It’s really that easy to make vegan yogurt. From home. From scratch. From ingredients you’re ok with.
All while saving money! That’s what it’s all about, right?
Real food. Real easy.
Be sure to bookmark this recipe in your browser so you can have it available whenever the craving hits!
VEGAN YOGURT

Ingredients
- 1/4 cup raw cashews
- 4 cups almond milk
- 2 Tbsp tapioca starch
- 1 cup plain almond milk yogurt
Instructions
- Blend the cashews, almond milk, and tapioca starch.
- Once smooth, transfer to a small pot or large saucepan and stir constantly at medium heat, allowing it to thicken and come to 180 degrees F. This took about 30 minutes or so.
- Once it’s come to temperature, let the mixture cool to 110 degrees F. This took about another 30 minutes.
- Transfer 2 cups of mixture to glass bowl or measuring cup. Add your store-bought almond milk yogurt and stir to combine. Then just pour is back into the remaining mixture on the stove and stir it up.
- Now you can transfer entire mixture to sterilized jars (3 16-ounce jars or 6 8-oz jars would work).
- At this point, you can put the jars in an electric pressure cooker or the oven.
- PRESSURE COOKER INSTRUCTIONS: Add 2 cups of water to the pressure cooker. Add the rack that came with the pressure cooker. Place jars on top (you can layer a rack on top of the jars if you’re using short jars.) Add the lid and use the yogurt cycle.
- STOVE INSTRUCTIONS: Preheat oven to 200 degrees F with a baking stone in the bottom. Heat for 30 minutes (you can sterilize your jars now!), and turn oven off. Wrap jars with thick towels on a baking sheet. Place in oven (turned off) for 6-8 hours to culture. Cap the jars and refrigerate for at least 8 hours.
- Sweeten as desired with fruit, maple syrup, or sweetener of choice.


Thank you so much. I am going to try your method. Vegan yogurt is SO expensive here in SA.
Hi Sandi! Thank you for much for letting me know you are giving it a try! I hope you love it!